Categories
IGO720 - Module 4

Game Design…

Week 2.1 – 4th February. 2022

By the end of this 2nd week for IGO720, we are encouraged to look into the following areas;

  • Identify game design principles.
  • Analyse existing games in terms of game design principles.
  • Apply game design principles to create original game concepts.
  • Evaluate the scope of a game concept.

How to start the game design process?

We are asked to research one of our favourite games, and analyse it, as though we were creating a Game Design Document for it.

This encourages us to get familiar with creating Game Design Documents, and understand the processes involved, when working with a new game concept.

During Lobb’s video on; “Starting the Game Design Process“, he discusses numerous ways of developing your game, from the initial concept, using different prototypes, such as; paper prototyping, and digital prototyping, to working on the general mechanics first hand, and testing.

Mechanics – Fun Curve…

Whilst reading further into Scott Rogers book; “Level Up: The Guide To Great Video Game Design,” and specifically chapter 12; “The Nuts and Bolts of Mechanics“. I found a fantastic quote, which reminded me, to think about my own reason for wanting to play certain games, and what makes me want to keep playing, what is so appealing? Scott Rogers quotes;

“My key to keep players from “going over the fun curve” is to create ramping gameplay. A designer must build one gameplay system upon the last, teaching players a new move and how to master it against mechanics and enemies.”

(Rogers 2014, p361.)
0

I started to list what makes me drawn to my current games…

Castle Story – Phone App

  • Really nice colour of artwork/ well drawn/ and detail.
  • The imaginative journey you are taken on.
  • The task of making buildings, where you then need other objects to make other buildings/ which leads to upgrading.
  • Plus the idea of expanding the kingdom.
  • Plus characters that are cute, and speaks some text… to help get you more involved.

Although these are all positives, in my personal opinion, there are a few things which discourage me.

a) The time it takes to make certain items.

b) The amount of lives or health.

c) To much text.

I compared this game above to one, recently downloaded…

Lilys Garden – Phone App

  • Really nice colour of artwork/ well drawn/ and detail.
  • The imaginative journey you are taken on.
  • The task of improving your home design and garden, then you know you have to play the mix/match game grid again, then you get a reward/ incentive .
  • Plus the idea of reviving, redesigning and discovering new areas of house and garden, and a secret past of her aunt who left the house.
  • Plus characters that are cute, and speaks some text.. to help get you more involved.
  • Not to much text. Plus more free incentives.
  • Gameplay time increased… rewards that make you have unlimited time of your 4 lives.

The games I have briefly analysed above, are both really good at the point Scott Rogers highlights, that it is important to; ” build one gameplay system upon the last“, this helps me to re-focus on creating a detailed character, and re-drawing the character as a whole, from the front view to the side view, and once 3D modelled, to work on one mechanic at a time.

Note; to keep in mind: A clear idea of how my character looks and what she can do, and to think more about the mechanics that would match her personality and the story/ adventure of the game, as a whole.

Digital Prototyping…

Last week, I began the module, with a focus on speed, an aim to create a good story, which I already have, then a 3D character in Maya.

However the last character I created was low poly, and this time around I wanted to experiment with making a smooth 3D model, following a tutorial, as I displayed in last weeks images/ screen shots, and references. But problems arose.

From the image below, you can see I kept checking the head of the character from all angles, but in the front view, when I was trying to move an edge that was already part of the polygon, I wasn’t able to do so, and as I was using a apple magic mouse, I then began trying to add an edge loop, this is when finally the edge I wanted, become available to drag out to the required position.
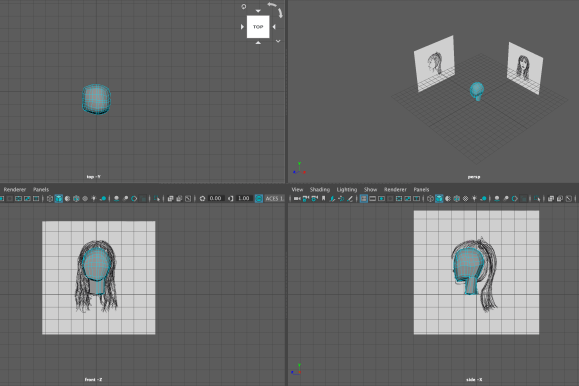
(Figure 1: Norton 2022 Four View)

Problem – Edges

The images below show the extra edges that was created, and when the next step was to cut the head shape in half, selecting half was fine, but deleting half was not so simple. The polygon, left so many stray edges, which not only effected the shape of my head, but also the shade and colour.

Solution!

After some more research on 3D modelling tutorials, I have chose to follow a new professional, called; ‘Animator Artist Life‘, which are small tutorials less detailed and is helping me to create models in Maya, following the best practices.

  • First part is to create my front and side views of the whole character, ready to place into Maya. But it is very important, that they are exactly the same size. This may have been part of the problem, when also trying to model the head. The size was slightly smaller on one of my planes.

These small differences make a huge effect with your development time, and for your model to be made correctly, with a smooth finish, as I have recently found out.

Game Feel

In Steve Swink’s book: Game Feel; A Gamers Guide to Virtual Sensation“, and his chapter on; “The Game Feel Model of Interactivity. Steve Swink quotes;

“Experiencing game feel is feeling out the game world, making additional distinctions, and learning skills, concepts, and generalisations that make coping with the unique world easier.”

(Swink 2009, p65.)
0

He continues to explain that a game world should be simpler then, the real world. My understanding of, “feeling out the game world“, means, making sure I know the reason my character does, “what” particular action, “why“, and to embody the character.

I shall do this by acting out the movements, creating a voice for her, imagining the world she is in, what her emotion is, what she may be feeling, and picture what I might do, and my reaction, as if I was in her shoes.

This is how I hope to make the player “feel” my story, by doing the above and transforming those actions in Unreal, and adjusting the animations, to fit my character persona, with the animation blue print, and a blend space.

In the words of Mark Brown, and his video series called; “Game Maker’s Toolkit” – he analyses a numerous amount of games, paying close attention to; game design, level design, and game production.

“making every lick of polish, speak to what the game is really about.”

(Brown 2015)
)

This is was my initial intension, and from here out I will show you my development, from character – 3D modelling – videos of my progress, importing into Mixamo – and manipulating the animations in Unreal Engine 4.

Week 2.2 – 8th February. 2022

Character Design

Below is my main character for my new game concept. (click on image to see each one)

3D Maya Development…

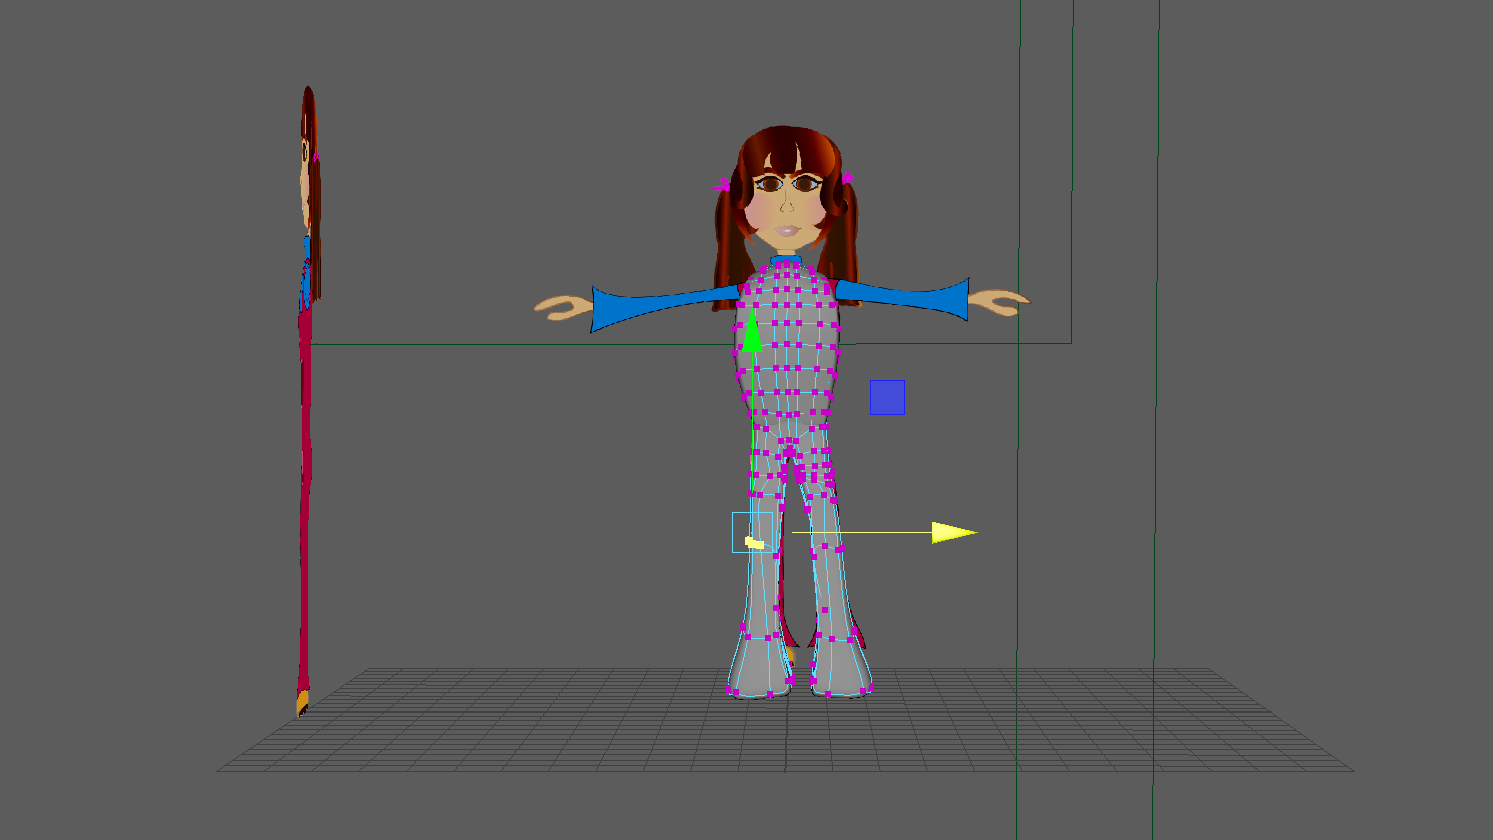
First part of the process – Planes both in place – adjusted to size 2 – feet on the line. Starting with a simple cube, and making sure it is aligned with both planes. Making sure to manipulate the shape, add more faces, move edges and vertices, to match that of the characters shape.
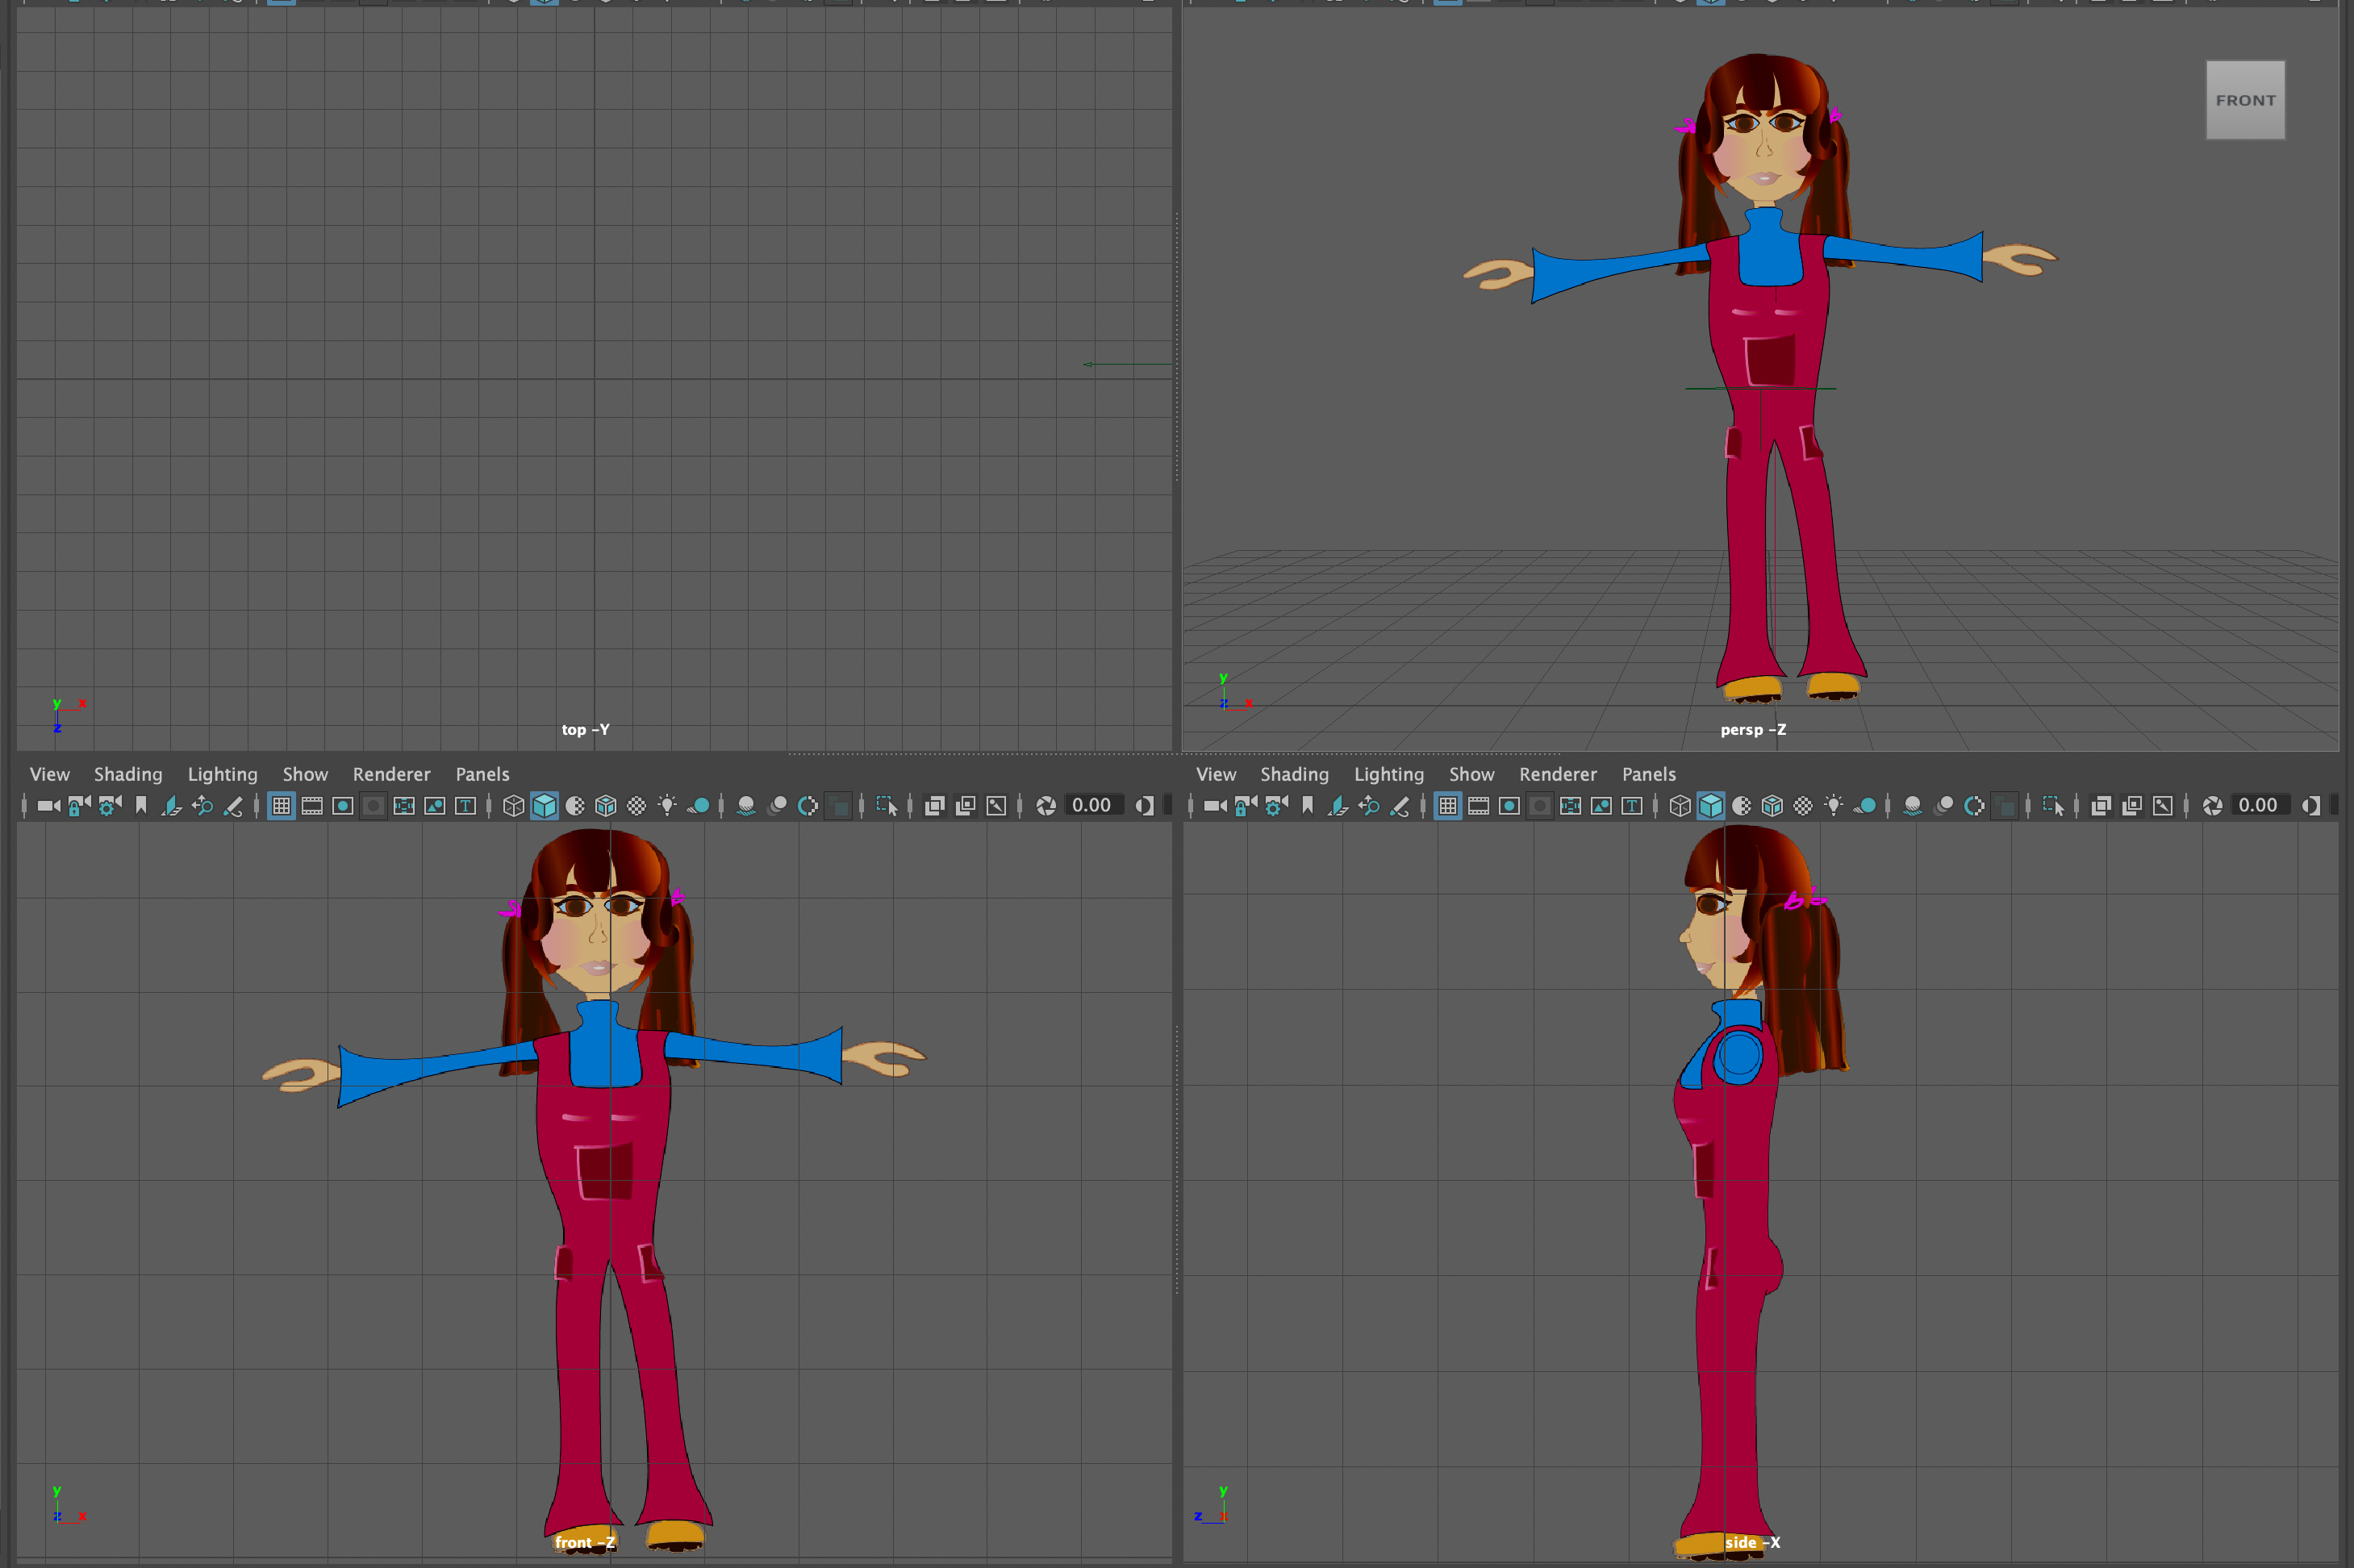
(Figure 4: Norton 2022 Four View)

Continuing to develop characters Torso, shown below.
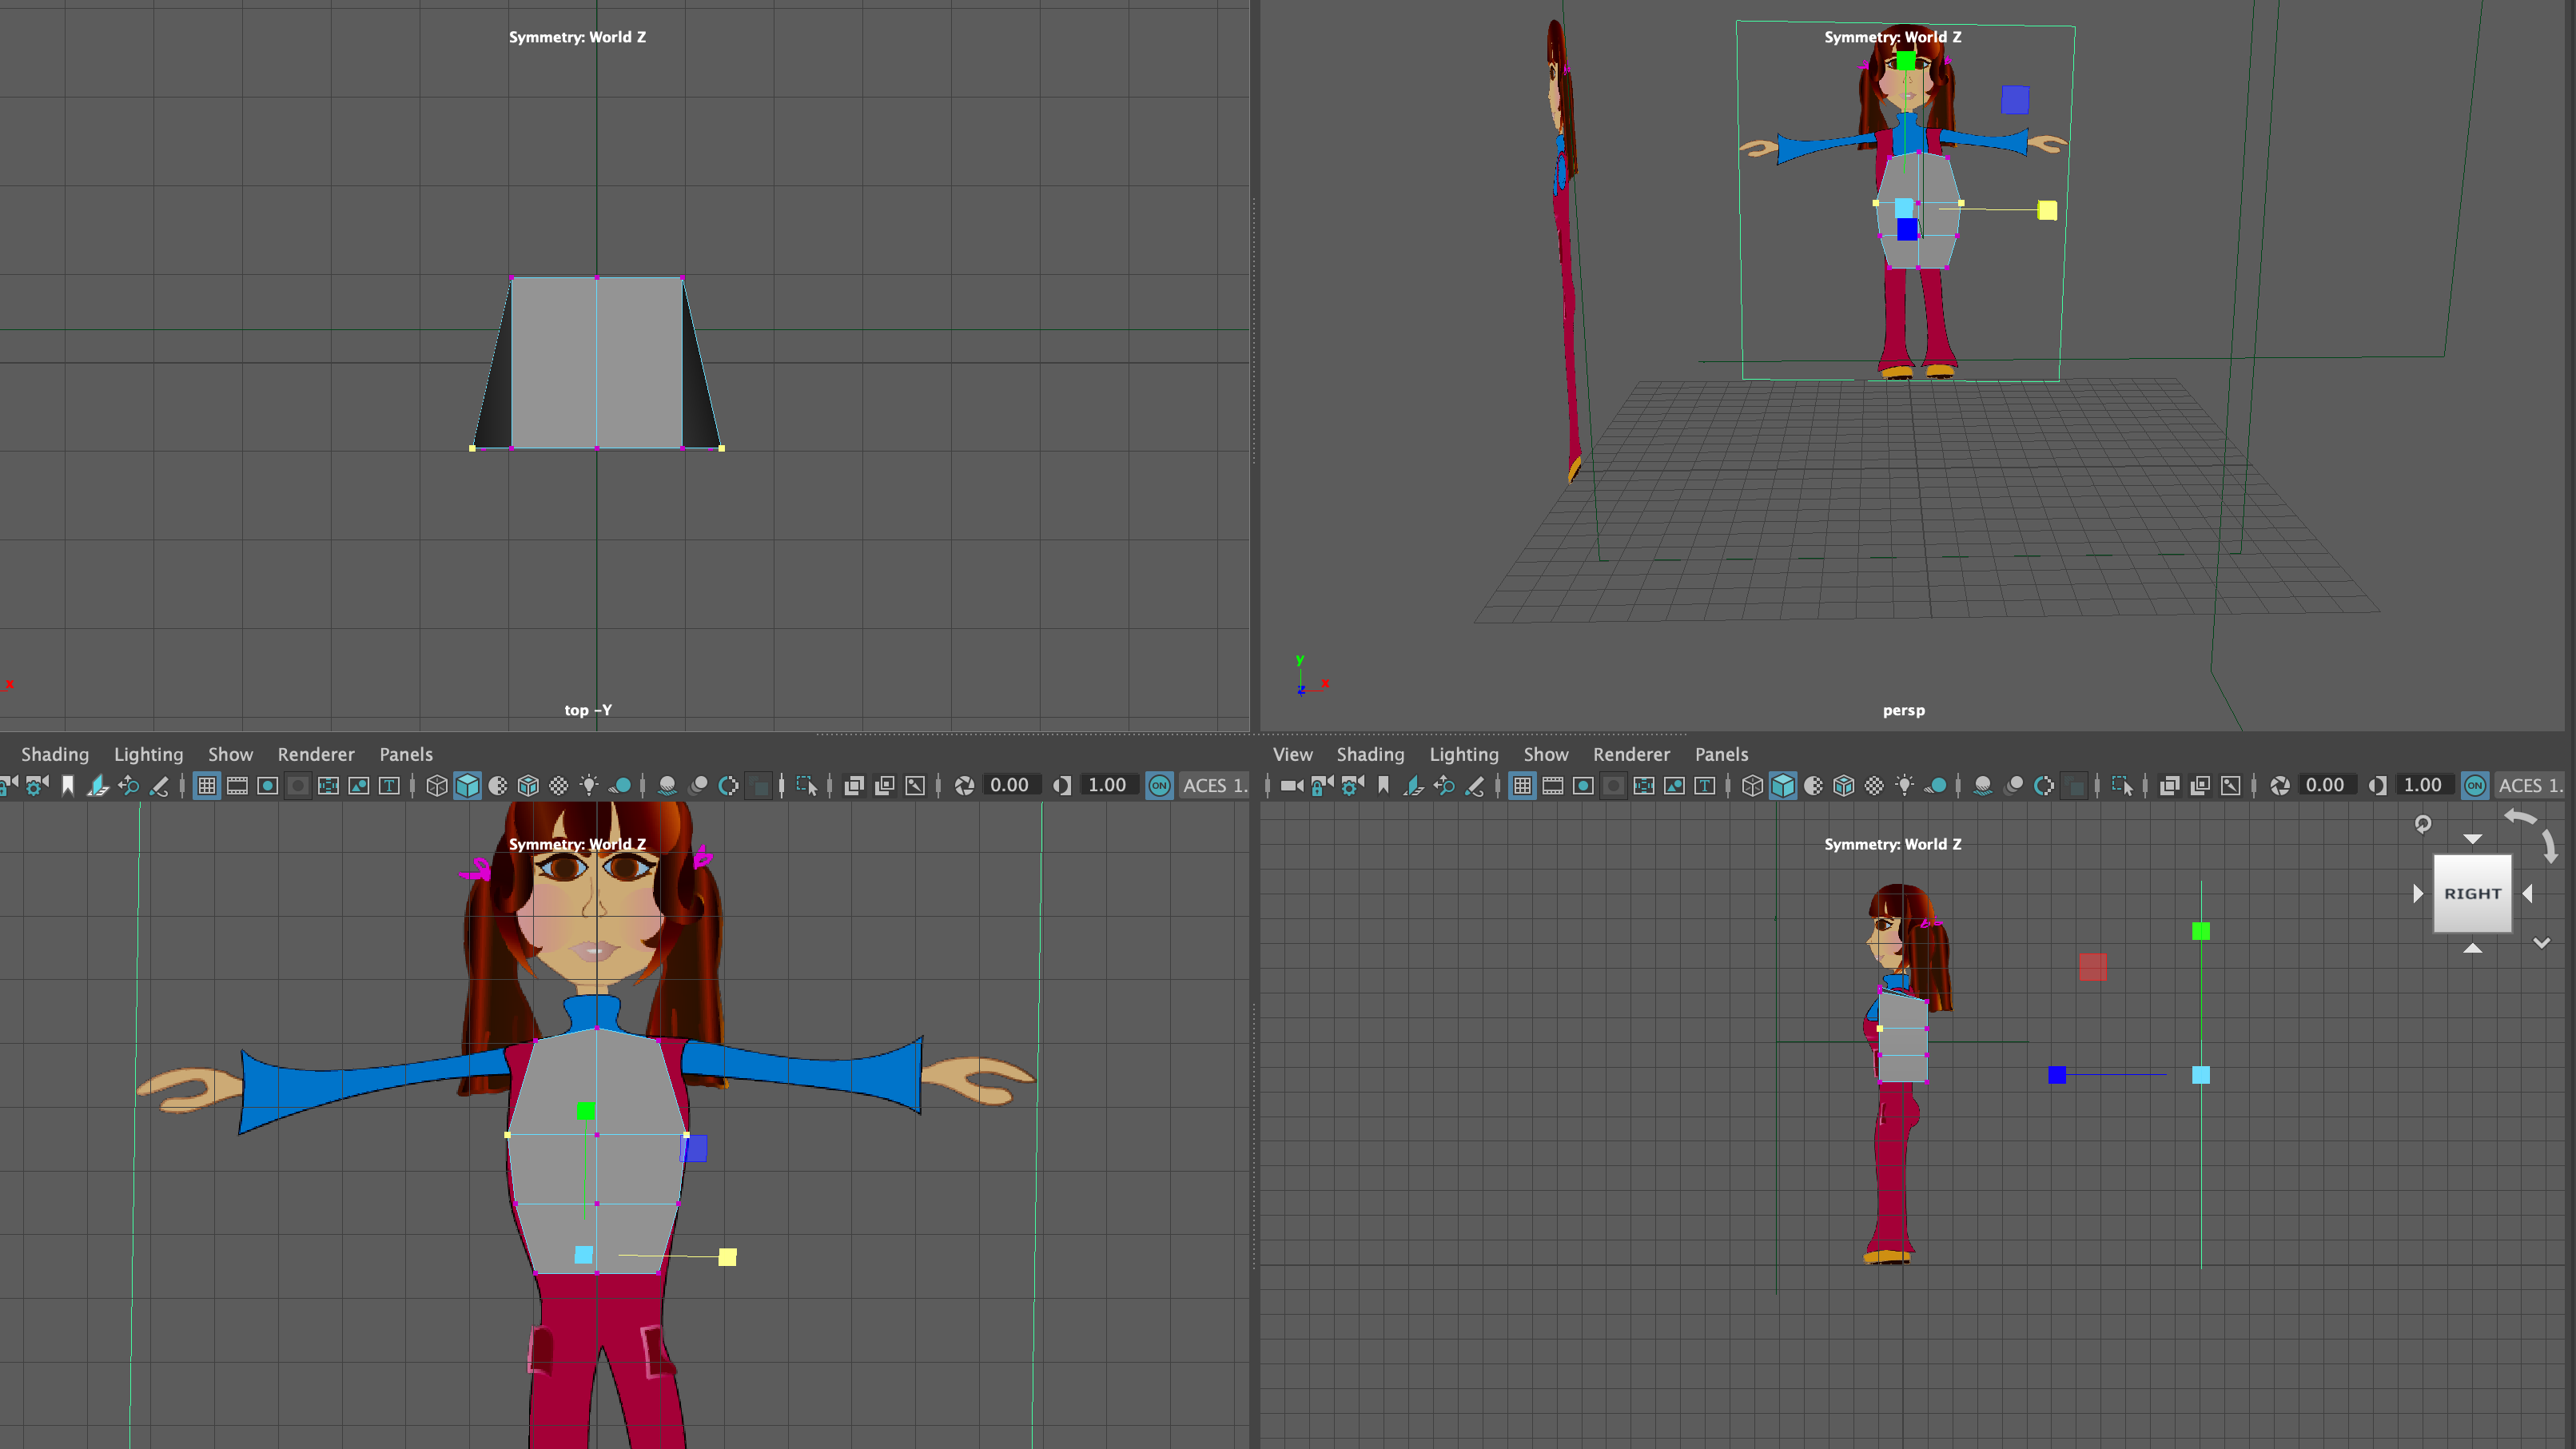
(Figure 5: Norton 2022 Four View)

After more development…

References

Lobb, I. (2022) Starting the Game Design Process. [online]. Available at: https://learn.falmouth.ac.uk/courses/251/pages/week-2-game-design-process-and-principles?module_item_id=13014 [Accessed 4 February 2022]

Animator Artist Life. 2020. ‘Setting up image planes in Maya – 3D Modelling a cartoon character – PART 01’ [online]. Available: https://www.youtube.com/watch?v=asfhKxLUdOQ&list=PLIV47uRi3f2Ub9INK89HnmkLgmNYjvcL6&index=2 [Accessed 7 February 2022]

Animator Artist Life. 2020. ‘How to Model a Cartoon Character in Maya – PART 02 – 3D poly modelling the Body’ [online]. Available: https://www.youtube.com/watch?v=asfhKxLUdOQ&list=PLIV47uRi3f2Ub9INK89HnmkLgmNYjvcL6&index=2 [Accessed 7 February 2022]

ROGERS, Scott. 2014. Level Up ; The Guide To Great Video Game Design. 2nd edn. John Wiley & Sons, Ltd.

SWINK, Steve. 2009. Game Feel ; Game Designer’s Guide to Virtual Sensation. Morgan Kaufmann Publishers.

BROWN, Mark. 2015. Game Maker’s Toolkit – Secrets of Game Feel and Juice. [online]. Available at : https://learn.falmouth.ac.uk/courses/251/pages/week-2-game-feel?module_item_id=13016 [Accessed 7 February 2022]

Full List of Figures

Figure 1 : Norton 2022 Four View (screen shot from Maya)

Figure 2 : Norton 2022 Front View (screen shot from Maya)

Figure 3 : Norton 2022 Side View (screen shot from Maya)

Figure 4 : Norton 2022 Four View (screen shot from Maya)

Figure 5 : Norton 2022 Four View (screen shot from Maya)

Categories
GDD730 - Module 2

Practice Pitch Week!

Week 6.1 – 2nd July. 2021

Research – And Now the Hard Part…

To begin this week, I have found a really good chapter in; Scott Rogers book Level up – A Guide to Great Video Game Design. He lists all the key objectives, that need to be seen or mentioned throughout a pitch presentation.

Rogers states the importance of making each part of the pitch a) easy to read, b) to show a few words at a time, c) show more pictures, d) make sure you have a variety of images, and to keep your audience engaged!.

Key areas to include below;

  • Title screen with Logo
  • Company Profile
  • High Concept
  • Who your game is for?
  • Why everyone should care about your game?
  • What your game is about?
  • How your game will be awesome/ What makes it different?

He advises to only show some of your best pieces that will make your game stand out from the rest, and not to show more then necessary, as it could overwhelm your audience you are presenting too.

“A pitch is a streamlined, easily digestible version of your game design document. It contains everything that’s great and original about your game with out all the “twiddle bits”.

(Rogers 2014 : 451)

The Art of Game Design

In comparison to Jesse Schell’s book; The Art of Game Design, discusses the 12 pitch tips, however the only tips that I need to apply are; showing passion for the game, understand from their point of view, be aware of all details, and to be confident.

I always think confidence can sometimes make you sound like a “know it all”, but in this instance, Schell explains by believing in yourself, you are showing that you believe in your game, and your team.

“Being confident means you are sure your game will be perfect for the client and that your team is the perfect team to pull it off.”

(Schell 2013 :528)

This now leads me to discuss our performance, with the practice pitch.

Week 6.2 – 7th July. 2021

Pitch practice in action!

This slide needs to be worked on – more detail to be added about the game references we are using. We cannot assume the audience knows our references already. We need to highlight what particular element that inspired us from that game.

(Figure 1 : Land 2021 Game References)

This slide was never added, but after the feed back from the judges, I think we need to add it in here, straight after the concept slide, with a Mood board to show the colours we were going to be using.

I think it helps to clarify to the audience what the stages are, and helps to make the level seem more engaging. They will have an idea of the end goal for the first level.

(Figure 2 : Norton 2021 Game Map)

How the player moves, what actions they do and how to control them needs to be shown. (following with another slide)

(Figure 3 : Larkin 2021 Mechanics)

Retrospective of the journey so far…

Their are three main areas, that are considered throughout the retrospective; 

What should be started?

  • 1) A coloured mood board.
  • 2) Adding the isometric map into pitch deck, visually show where the player starts and finishes.
  • 3) A short storyboard to introduce the characters, background and game name.

What should be stopped?

  • 1) Burning the candle at both ends.

What should be continued?

  • 1) Using the 10 Pitch slides.
  • 2) Developing the game demo.

Retrospective is key to reflect on what happened, any iterative processes put in place which didn’t work, analyse why and devise a plan to avoid it happening next time around. But keep simple.

As Schell would say:

Your pitch should be accessible, have surprises, have a good interest curve

(a hook, a build, tense and release, a climax), etc. It should have a good aesthetic design, favoring images over words whenever possible.

Your pitch should be elegant, focusing primarily on what is unique about your game, why it will succeed against the competition, and why it is a good fit for the person you are pitching it to.

(Schell 2013 : 477)

Further Research – Pitch Retrospective -Gigaom

I have delved a little deeper into pitch retrospectives from a judges point of view, and have found this tweet, that is a really great point.

My first experience for the practice pitch, and my after thoughts were completely on track with this quote below. I started to feel like we were trying to make the game more complex than need be.

I feel its good to show why you should play the game, what the characters do, what the rewards are, to keep you glued to the screen, but I don’t think we need to add anything else.

“The trick, therefore, is to present something simple: while this may only be a subset of what you do, it may be enough to move you forward. The more complicated it is, the less of a pitch it becomes.”

(Gigaom 2018)

References

ROGERS, Scott. 2014. Level Up ; The Guide To Great Video Game Design. 2nd edn. John Wiley & Sons, Ltd.

SCHELL, Jesse. 2020. The Art of Game Design ; Book of Lenses. 3rd edn. Tailor & Francis Group

Gigaom: When is a startup pitch not a pitch? Retrospective thoughts on TechPitch 4.5. 2018. Available at : https://www.proquest.com/blogs-podcasts-websites/gigaom-when-is-startup-pitch-not-retrospective/docview/2027693963/se-2?accountid=15894 [Accessed 07/07/21] Chatham: Newstex.

Full list of Figures

Figure 1 : Land 2021 Game References

Figure 2 : Norton 2021 Game Map

Figure 3 : Larkin 2021 Mechanics

Categories
GDD710 - Module 1

The Big Reading Week.

Week 6.1 – 10th March. 2021

The Retrospective

After looking at the article heartbeat retrospective, and closely at the common pitfalls, I understand this to be a workshop of reflection, structured with the steps as shown below;

  • Regular meetings with your team to simply debrief.
  • Everyone should feel comfortable to speak, just highlight a few areas, speak the facts only.
  • Discuss the relevant areas that are currently affecting the iteration process.
  • Have a couple solutions to work with, to keep simple.

Their are three main areas, that are considered throughout the retrospective;

  • What should be started?
  • What should be stopped?
  • What should be continued?

My Start item will be: (marked with two stars **)

  • Reading one journal article a week to inform your practice
  • Writing a progress summary in your journal before you attend the webinar
  • Writing a weekly plan to help structure the work **

My Stop item will be:(marked with two stars**)

  • Burning the candle at both ends **
  • Working in a silo and not seeking advice and support from peers
  • Leaving it until the last minute to write in the journal

My Continue item will be: (marked with two stars**)

  • Posting in the forums on a regular basis
  • Follow tutorials as part of the self-directed practice**
  • Attending the webinars

Both the start and stop items are used automatically when my SMART goals were noted, as they seem to follow through what I have put in place.

Retrospective is key to reflect on what happened, any iterative processes put in place which didn’t work, analyse why and devise a plan to avoid happening next time around. But keep simple.

Session 1 Rapid Ideation – Reflection

Looking back on the development of rapid ideation session one, I know for sure that there was room for improvement. I wish I had, had my SMART goals in place, and only learnt a little about 2D animation for example, and not to of tried using so many new applications, which just holted my progress altogether, and made me question, if I was even capable of learning a new technical skill this quickly.

Pages and Posts

That doesn’t even include, the fact of which I was struggling with writing a post on here, and realising I had my entries as pages, not posts. This was a big turning point for me, after working this out, I was able to add tags, and categories, to make my site more accessible. This is where I started to understand the need for an organised, well structured website.

Week 6.2 – 11th March. 2021

SMART – Ready – SET – GO !!

To reiterate, in this coming webinar, when we get out next rapid ideation tool to experiment with, I am going to do things differently.

I have my goals in place to help with organising my time:

  • To do an equal amount of research; including reading, writing, watching, linkedIn learning, and practical.
  • Make sure to stick with my idea, not to get distracted by all other possibilities.
  • To learn new technical skills for an hour at a time, break, and try out what I have just learnt, rather than jumping to far ahead!

Since making my self SMART goals, I have started to continue reading ‘Level up’, to understand more about the process of creating a game from scratch. This is where I put my organised schedule into action.


In Chapter 4 ( level 4 ) titled; ‘You Can Design a Game, but Can You Do the Paperwork?’
Scott Rogers states;

“It’s no crime to be a perfectionist, but many design issues can be thought out and designed on paper first before a single pixel is rendered or a line of code typed.”

(S, Rogers. 2014. p90)


This immediately grabbed my attention, my determination of trying to create something that will look amazing on screen, and helping to engineer a game/ app or animation that you just can’t leave alone, is all I seem to focus on!

This is exactly what I have done with with my personal development, and because of trying to add code, and bring Ralphy to life in only a few frames, it was impossible to get a decent animated character.


I think it might be worth going back to basics, sticking with drawing and scanning my work, ideas and laying out concepts on paper, before even thinking of bringing my illustrations to life.

After all this is what Briggs would do when he originally created ‘The Snowman‘, and he is one of the illustrators, who pays very close attention to adding emotion and movement behind all of his sketches, before even laying them out onto a storyboard.


Week 6.3 – 14th March. 2021

Points to remember

Rogers also discusses in his book ‘Level Up‘, how important it is to be mindful of your peers, as we all have our own limitations.

We first discussed this in week one, talking about Scrum agile framework …It’s vital we have someone in charge, ideally that can make sure that each person, (when in a team) is doing their part, and has been assigned the correct area, that matches their skill.
Other wise, this could dramatically hold everyone up, especially when that person doesn’t quite understand what is expected of them. 

Throughout this course, I feel like I am on the biggest learning curve ever, with excitement leading the way, I pinch myself just to check that what I am creating is real…and can be improved or developed in one way or another.

Kanban

I am now starting, very slowly, but surely to understand the nature of reflection. 
I have started to read another book, which my partner has actually recommended;

The Toyota Way : 14 Management Principles; from the Worlds Greatest Manufacturer.

This actually links onto the Kanban Method that I have been practicing.

The book reveals the methods and approaches, used in production;

Jidoka – Originated from an invention from Toyoda, a carpenter who made wooden spinning machines, and in 1894 the manual looms he started experimenting with, were low in cost, but worked better than his existing looms.

“designing operations and equipment so your workers are not tied to machines and are free to perform value added work.”

J K, Liker. 2004 P16

This step would lead to the creation of a much broader System!!

Toyoda; Unhappy with seeing his mother, grandmother and friends working so hard, this sent him down his next path, and took production to next level.

“He wanted to find a way to relieve them of this punishing labor, so he set out to develop power-driven looms.”

(J K, Liker. 2004 p16)

This intention was crucial, and helped to build TPS (Toyota Production System).

  • Jidoka (automation without human touch)
  • JIT ( Just In Time) – to order what parts you are running out of, just before you do runout.
  • Continuous Flow (focusing on today, and tomorrow)
  • Kaizen (change for the better)

This is what brings us to Taiichi Ohno – the founder of the TPS, (Toyota Production System), which has a strong focus on Jidoka, Toyoda’s sons approach JIT, (Just In Time) and his own discovery Continuous Flow. He also talks about Kanban and Kaizen.

He compares Kanban to a gas gauge that is built into the car – when it signals – you know you need to fill up. As for Kaizen, making tiny improvements is just as important when achieving a lean goal, which eliminates all waste, that adds cost without adding to value.

References

Heartbeat Retrospective (2020). Available at: https://bit.ly/3b17dtO [accessed 10 March 2021]

ROGERS, Scott. 2014. Level Up ; The Guide To Great Video Game Design. 2nd edn. John Wiley & Sons, Ltd.

LIKER, Jeffrey K. 2004. The Toyota Way ; 14 Management Principles from the Worlds Greatest Manufacturer. McGraw-Hill.